
Ice Damming on GTA Roofs: Why It Happens and How to Stop It
The physics behind ice dams, why older Scarborough and Etobicoke homes are especially prone to them, and the prevention hierarchy that actually holds up through a Toronto winter.
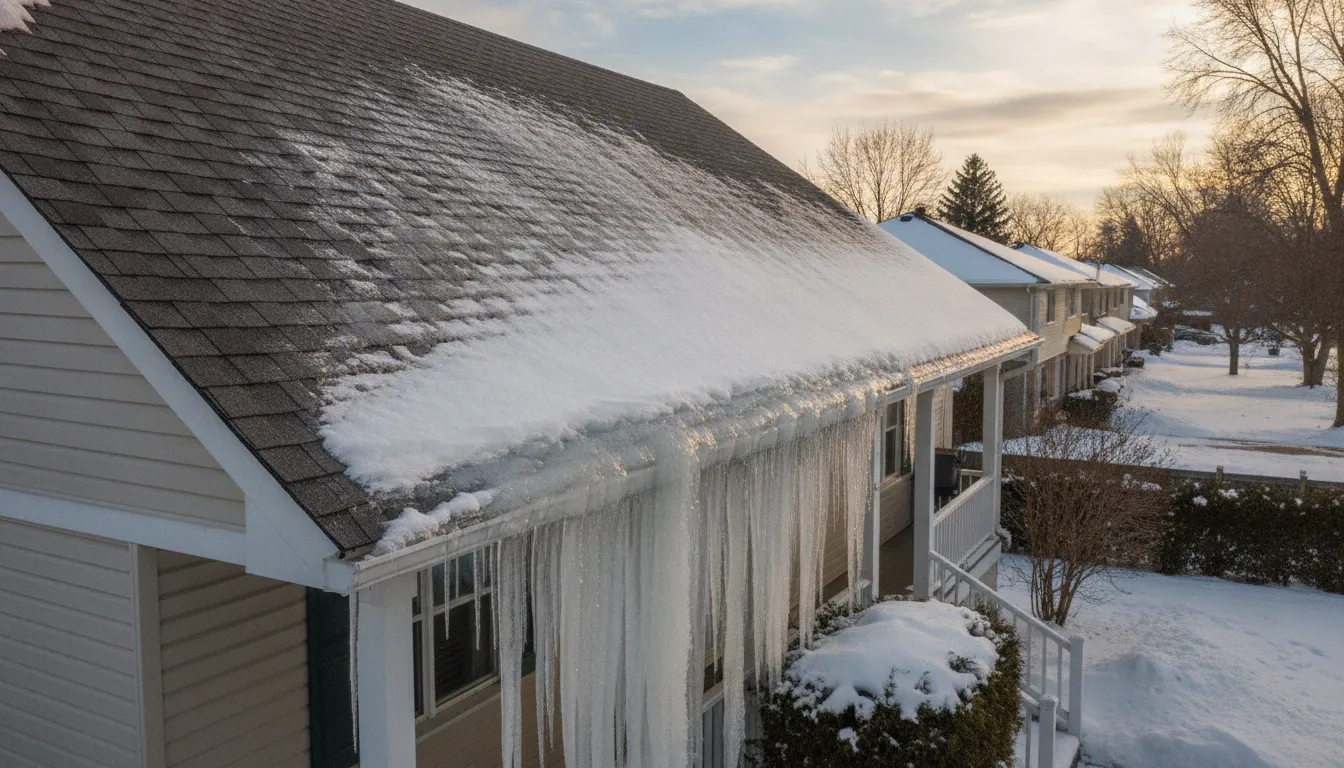
The Physics of an Ice Dam
An ice dam is not caused by cold weather on its own. It is caused by uneven roof surface temperature, and that unevenness almost always traces back to heat escaping from the living space below. Understanding the mechanism is the first step to fixing it, because homeowners who treat the symptom (the ice itself) without addressing the cause tend to see the same dam re-form the following winter, sometimes worse.
Snow melts unevenly across the roof plane
When attic heat escapes into the roof deck, the upper portion of the roof warms above freezing even though outdoor air is well below zero. Snow sitting on that warm zone melts. The eave overhang, which sits beyond the heated wall line and has no warm attic underneath it, stays at ambient temperature. Meltwater running down from the warm zone hits the cold eave and refreezes on contact.
The dam grows from the bottom up
Each freeze-thaw cycle adds another thin layer of ice at the eave. Over a period of freeze-thaw days, which the GTA gets plenty of given how often daytime temperatures cross zero in January and February, the ice ridge thickens into a dam that can be several centimetres to over a foot tall on a badly affected roof.
Water finds the path of least resistance
Once the dam is established, meltwater pools behind it instead of draining off the eave. Standing water under shingles behaves very differently than moving water. Asphalt shingles are designed to shed water running downhill, not to hold back standing water indefinitely. Given enough time and enough head pressure, water works its way sideways and upward under the shingle laps and through fastener penetrations.
The leak often shows up far from the dam
Meltwater that gets under the shingles can travel along the deck sheathing before finding a gap, a nail hole, or a seam to drip through into the attic or down an exterior wall cavity. This is why homeowners sometimes see a stain on a bedroom ceiling that has no ice visibly overhead. Trace the water's path back to the eave, not straight up from the stain.
Why Attic Bypasses Matter More Than Insulation Thickness Alone
Most homeowners assume ice damming is purely an insulation problem, so they add more loose-fill insulation and expect the issue to disappear. That helps, but it is only half the equation. The bigger culprit on a lot of older GTA housing stock is air leakage from the living space into the attic through gaps that insulation alone does not seal.
Air bypasses move far more heat than conduction
A pot light, a bathroom fan housing, a plumbing stack chase, or a gap around a chimney chase lets warm, moisture-laden air rise directly into the attic through convection. A single unsealed bypass can move more heat into the attic than several extra inches of batt insulation is meant to stop, because you are moving heated air itself, not just letting heat conduct through a material.
Bathroom and kitchen exhaust fans venting into the attic
This is common enough in older Etobicoke and Scarborough bungalows and post-war housing that it deserves its own line item. If a bathroom fan duct terminates in the attic instead of through a proper roof or soffit vent cap, it is pumping warm, humid air directly under the roof deck every time it runs. That is a direct contributor to both ice damming and attic frost.
The attic hatch is a bypass too
An unweatherstripped attic hatch or a folding attic stair without an insulated cover acts like a hole in the ceiling. It is a small area relative to the whole ceiling plane, but the air leakage through and around it can be disproportionately large.
R-value only works once air movement is controlled
Ontario Building Code guidance for attic insulation in the GTA climate zone generally points toward R-60 as the target for new construction ceilings, up from older norms closer to R-40. But R-value is a measure of resistance to conductive heat flow through a material at rest. It does nothing to stop air that bypasses the insulation layer entirely. Air sealing has to happen first, or be done at the same time, for added insulation to deliver its rated performance.
Ventilation: The Other Half of a Cold Roof
Air sealing and insulation keep heat out of the attic. Ventilation removes whatever heat and moisture still make it in, and keeps the underside of the roof deck close to outdoor temperature. Both are necessary. A well-insulated attic with poor ventilation can still run warm enough at the ridge to trigger melt, especially on a sunny day with cold air temperature, because solar gain on dark shingles adds heat that insulation alone cannot offset.
The balanced intake and exhaust principle
A functioning cold-roof ventilation system pulls cold outdoor air in low, at the soffit, and lets warmed air escape high, at the ridge or through roof-mounted exhaust vents. The commonly used design ratio is 1:300, meaning 1 square foot of net free vent area for every 300 square feet of attic floor, split roughly evenly between intake and exhaust. Some jurisdictions and unheated-attic conditions call for 1:150; a roofer sizing your system should be working from your actual attic floor area, not guessing.
Blocked soffits are extremely common on older homes
On a lot of Scarborough and Etobicoke housing built in the 1950s through 1970s, insulation has been topped up over the decades without anyone checking whether it is burying the soffit vents from the inside. Baffles (also called proper vents or rafter vents) need to hold a clear air channel from the soffit opening up past the top of the insulation. Without them, loose-fill insulation slumps into the soffit cavity and chokes off intake air, even if the exterior soffit itself looks fine.
Ridge venting versus box vents versus power vents
A continuous ridge vent paired with continuous soffit intake is generally the most consistent performer because it draws air passively along the full length of the roof rather than at isolated points. Box vents can work but create uneven flow patterns if not spaced correctly. Powered attic fans are best avoided on homes with air-sealing gaps below, because a powered fan can depressurize the attic and pull even more heated, humid house air up through those bypasses, which works against the goal.
The Prevention Hierarchy: What Actually Stops Ice Dams
There is a correct order of operations here. Homeowners often start at the bottom of this list because it is the most visible and immediate fix, but lasting prevention starts at the top.
1. Air-seal the attic floor plane
Seal penetrations around pot lights, plumbing stacks, electrical wires, the attic hatch, and top plates before adding insulation. This is the highest-leverage step and the one most often skipped.
2. Reroute any exhaust fans that terminate in the attic
Bathroom and kitchen fans must vent to the exterior through a proper cap, not into open attic space.
3. Bring insulation up to a consistent, code-informed level
Even coverage matters as much as total depth. Thin spots at the eaves or around the hatch create localized warm zones.
4. Confirm and clear soffit-to-ridge airflow
Install baffles at every rafter bay before topping up insulation, and confirm exterior soffit vents are not painted over or blocked by insulation or debris.
5. Install ice and water shield at the eaves during any roof replacement
This self-adhering membrane is installed under the shingles from the eave edge up to a line at least 60 cm past the interior wall line, sometimes further on low-slope sections. It will not stop an ice dam from forming, but it stops the meltwater trapped behind one from reaching the deck and the interior.
6. Keep gutters and downspouts clear into late fall
Clogged gutters hold water at the eave even before freezing weather arrives, giving ice dams a head start once temperatures drop.
7. Mechanical removal is a last resort, not a strategy
A roof rake used from the ground to remove snow load, or careful steaming of an existing dam by a professional, treats the symptom for the current storm. Chipping at ice with anything sharp risks damaging shingles and should be avoided.
The Insurance Angle
Ice damming sits in an uncomfortable spot for homeowners insurance. Sudden water damage from a burst pipe is typically a clear-cut covered peril. Damage that results from a long-term maintenance issue, like an under-insulated and poorly ventilated attic that predictably causes ice damming every winter, can be treated differently depending on the policy wording and the adjuster's read of the cause.
Document the source, not just the damage
If you find water staining, take photos of the ceiling stain, but also get into the attic (or have a roofer do it) to photograph the insulation coverage, any visible bypasses, and the state of the roof deck near the eave. An adjuster's determination often hinges on whether the damage looks like a one-off weather event or a chronic condition.
Get a written assessment after a leak, not just a repair quote
A roofing contractor's written note describing the ice and water shield condition, insulation levels, and ventilation status at the time of inspection is useful documentation to keep on file, separate from the repair invoice itself.
Know that repeat claims raise flags
An insurer that pays out for ice dam damage once may ask pointed questions, or decline coverage, on a repeat claim at the same address if the underlying attic conditions were not corrected. This is a strong practical argument for fixing the cause the first time rather than only patching the ceiling.
Ice Dam Questions from GTA Homeowners
Does a new roof automatically fix ice damming?
Not by itself. A roof replacement is the right time to add ice and water shield at the eaves, which protects against leaks from a dam that does form, but it does not stop dams from forming in the first place. That requires attic-side work: air sealing, insulation, and ventilation. Toronto Roofing Companies typically flags attic conditions during a replacement quote and points out where the two projects should be coordinated.
Are older Scarborough and Etobicoke homes really worse for this?
Generally yes, for a few overlapping reasons. Housing stock from the 1950s through 1970s often has shallower original attic insulation, older or missing soffit baffles, and a higher chance of exhaust fans that were never properly vented outside. Decades of piecemeal renovations can also add pot lights or duct penetrations without anyone re-sealing the attic floor afterward.
Can I just add more attic insulation myself and skip the air sealing?
You can, and it may help somewhat, but it is treating half the problem. Air leaks move heat far more efficiently than conduction through insulation, so a homeowner who tops up insulation over unsealed bypasses often sees only a partial improvement. If budget is limited, prioritize air sealing first.
Is it safe to use a roof rake myself?
Roof rakes used from the ground on single-storey sections are generally safe and a reasonable homeowner task, since they remove snow load before it can melt and refreeze. Getting on a ladder to chip at an existing ice dam is where the risk goes up, both for personal safety on icy surfaces and for the shingles underneath, which can be damaged by anything sharp.
What is the ideal attic ventilation ratio for a GTA home?
The commonly referenced target is 1 square foot of net free vent area per 300 square feet of attic floor area (1:300), split between intake at the soffit and exhaust at the ridge or roof. Some attic configurations call for a tighter 1:150 ratio. The right number depends on your specific attic, which is why it should be calculated rather than assumed.
Why does Durham Region seem to get hit harder than other parts of the GTA?
Areas closer to Lake Ontario's downwind snowbelt effect, which includes parts of Durham, can see heavier and more frequent lake-effect snow accumulation than areas further inland. More snow sitting on the roof for longer stretches gives ice dams more material to work with once a melt-freeze cycle starts.
How much ice and water shield coverage do I actually need at the eaves?
Building code guidance generally calls for the membrane to extend from the eave edge to a point at least 60 centimetres inside the exterior wall line, measured along the roof slope. On roofs with a shallower pitch, or in areas known for heavier ice damming, extending coverage further up the slope is a reasonable upgrade to discuss with your contractor.
Not sure if your attic is set up to prevent ice damming?
Toronto Roofing Companies can assess your roof, attic insulation, and ventilation together and give you a straight answer on what needs fixing.
Get a Free Quote